
Cape Coral crash scene photos that actually prove your case
Right after a Cape Coral car accident, the scene feels loud and chaotic. Then, a week later, it turns quiet and slippery. Cars get moved, debris gets swept, and everyone’s memory gets polished into a story that helps them.
That’s why crash scene photos are vital. Not the dramatic close-up of a dent, but the boring, map-like photos that show where everything was, how it connects, and what the road was “saying” through marks, signs, and lighting. A personal injury attorney will use these to build the foundation of your case.
Below is a field-ready shot list you can follow in minutes, built around what insurers and lawyers actually use to test fault.
Start with the “map shots” that lock in location and orientation

Before you take any photo, handle safety first. Get out of traffic, call 911 if anyone might be hurt, and don’t stand in a live lane to “get the perfect angle.” If you can’t safely take accident scene photos, don’t.
Once it’s safe, think like you’re building a map for someone who wasn’t there. Your first goal is orientation, not detail. Take wide shots from all four corners of the intersection (or both directions on a straight road), capturing multiple angles to ensure nothing is missed. Step back far enough that the viewer can see lane markings, where the cars ended up, and the nearest control device (stop sign, signal, yield sign).
A simple rule helps: wide, then medium, then close. If you start with close-ups, you’ll end up with a camera roll full of “what is that?” photos.
Here’s how each distance tends to function in a claim:
| Photo distance | Where you stand | What it helps prove |
|---|---|---|
| Wide | Corner or shoulder, 20 to 60 feet back | Scene layout, lanes, sight lines, sign placement for proving fault in an insurance claim |
| Medium | Halfway to the vehicles | Car positions, debris spread, skid direction to establish sequence for proving fault |
| Vehicle Damage | Beside each vehicle | Severity of impact, damage patterns for insurance claim support |
| Close | 1 to 3 feet away | Skid texture, paint transfer, broken parts, sign damage for proving fault |
| “Context close-up” | Close, but with a landmark included | Exactly where evidence sits in the scene |
If you want a broader, day-by-day plan for gathering proof beyond photos, keep this bookmarked: evidence checklist.
Use a shot list that captures angles, lanes, signs, and vehicle rest positions
An adjuster evaluates your insurance claim based on photo evidence, asking the same questions when trying to poke holes in your story: Where was each vehicle before impact, where did they end up, what controlled the right of way, and what physical marks support that?
Work through this shot list in order. It’s fast, and it reduces missed details.
- Each approach to the crash: Stand where each driver came from and photograph the road leading into the impact area. Include lane lines and turn arrows.
- Both directions from the impact point: One photo looking north/south, one looking east/west (or “down the road” both ways).
- Traffic control devices: Photograph traffic signs like the stop sign or signal head as seen from each driver’s approach, not just a close-up of the sign. Include the stop bar or crosswalk line if present.
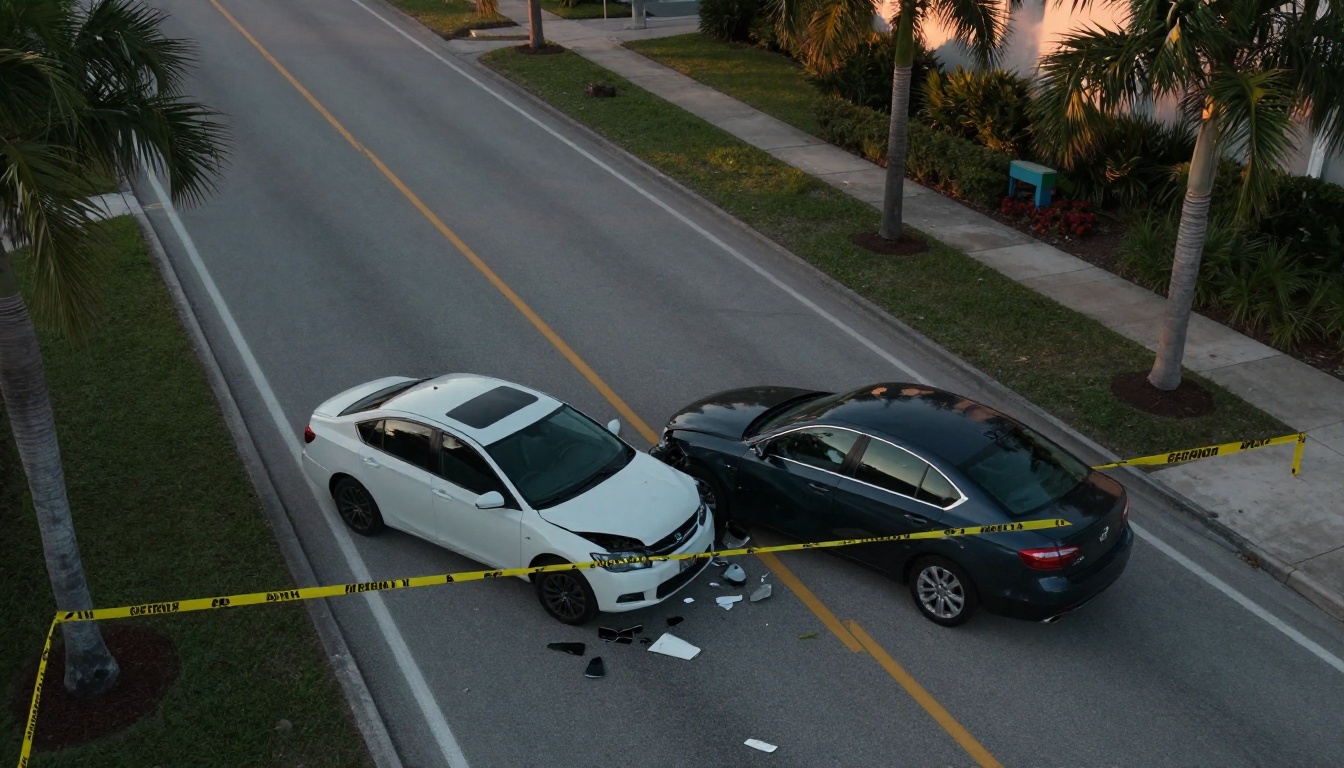
- Final rest positions: Take a wide shot showing both vehicles and the spacing between them. Then take medium shots of each vehicle from all four sides, capturing license plates.
- Damage with context: Photograph property damage areas with a small amount of road and the other vehicle in frame when possible. It helps show angle of impact.
- Debris field: Wide, then medium, then close. Debris often points to the impact zone and direction of force.
- Road conditions: Capture sand, gravel, standing water, glare, or potholes near the path of travel.
- Obstructions to visibility: Parked vehicles, landscaping, work trucks, or a curve can matter. Take a wide shot showing what blocks the view.
If you suspect nearby cameras, including those from the Cape Coral Police Department, may have surveillance video of the collision or the lead-up, act quickly. Many systems overwrite within days. Send a preservation letter to prevent footage from being overwritten. This guide explains how to move fast and ask the right way: Cape Coral crash surveillance video guide.
Photograph skid marks and measurements so they’re usable, not just “there”
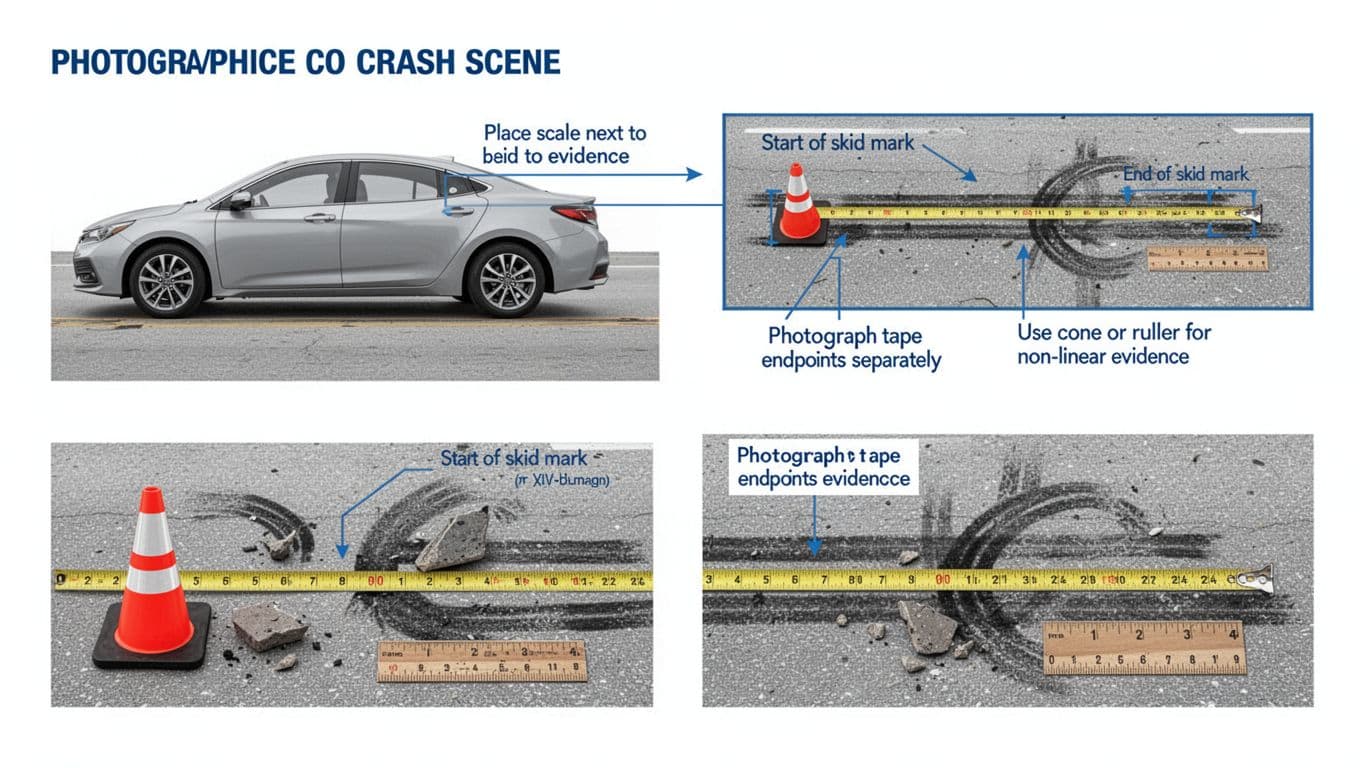
Skid marks are one of the most misunderstood parts of crash photography. People take one photo straight down and assume it “proves speeding.” Usually, it doesn’t. What makes skid evidence useful for proving fault in speed-related disputes is showing continuity, direction, and endpoints from multiple angles to reveal the length and texture clearly.
Start by finding the beginning. Often the first mark is faint, broken, or curved. Photograph the suspected start from a low angle (crouch if safe) so the texture shows. Then step back and take a medium shot that connects the start to the longer mark.
Next, photograph the end. The end might terminate at the impact zone, a yaw mark curve, or a point where marks fade out. Take vehicle damage photos there to document the point of impact and resulting property damage to the vehicles and road infrastructure. You want a clear “here’s where it begins” and “here’s where it ends” story.
Add scale whenever you can, even if it’s improvised. A measuring tape is best, but a ruler, standard traffic cone, or even a common object works if it’s consistent and placed right beside the evidence. Take two types of measurement photos:
- A photo showing the tape running along the mark (so the length is visible).
- Separate close-ups of the tape at the start and end so the numbers can be read.
Also take one wide photo that shows where the skid sits in the lane. Lane position matters, especially in left-turn crashes, drift claims, and “they changed lanes” disputes.
Finally, don’t “clean up” your photos. Don’t crop out the curb line, the shoulder, or the lane markings. Those boring edges are what make a photo defensible.
Handle Lighting Conditions and Nighttime Photos So Details Don’t Vanish into Glare
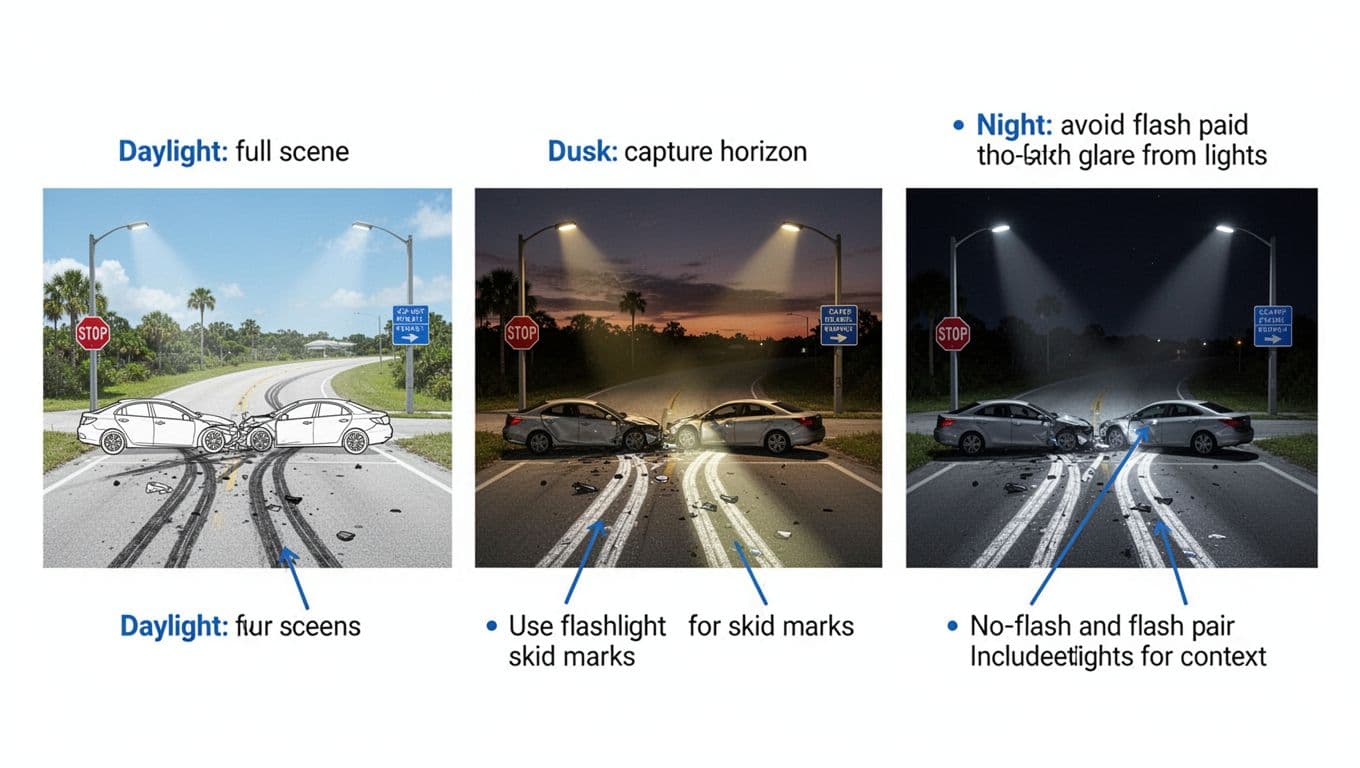
Lighting can change a “clear” skid mark into something your camera barely records. In Cape Coral, streetlights, wet pavement, and headlight glare can wash out the very evidence you’re trying to show.
If it’s dusk or night, take a no-flash and flash pair of key items (skids, debris, sign faces). Flash can reveal texture, but it can also blow out reflective signs. The paired approach gives you options later.
Control glare by changing your angle, not by fighting your camera. Step a few feet left or right. Lower the camera height. If your flash is reflecting off a sign face, shoot from slightly off-center so the reflection moves away from the lettering.
For reflective signs and signals, take one photo from the driver’s viewpoint distance (farther back), and one closer where the sign face is readable. If the sign is damaged, capture the damage close-up, then take a context photo that shows its location relative to the intersection.
If police responded and you think body-worn camera footage may show statements, positions, or field observations, request it early along with the police report, official crash record, dashcam footage, and witness statements to ensure video preservation. Video retention windows can be short. This explains the process and what to ask for: request police body cam video in Cape Coral.
Conclusion
A Cape Coral car accident scene disappears fast, but accident scene photos can freeze the facts before they get rewritten. Prioritize wide “map shots,” then work inward to signs, lane markings, skid endpoints, and scaled close-ups. Treat lighting like evidence too, and capture no-flash plus flash when glare is an issue. If you’re injured in an auto accident and the fault story is already shifting, these photos become crucial; a personal injury attorney can utilize them alongside medical records, medical expenses, and vehicle damage photos to file a strong insurance claim. Thorough documentation helps maximize Florida PIP benefits, pursue financial compensation, and protect your legal rights.